Round faces carry a natural softness that can feel instantly welcoming, but many beauty enthusiasts seek a look that accentuates length and structure without sacrificing warmth. The essence of makeup technique for round faces lies in shaping the interplay between light and shadow so that the eye perceives a sculpted silhouette rather than a perfectly circular contour. This requires thoughtful decisions about where to place illusionary lines, how to blend them into skin that reads as seamless, and how to apply color in a way that emphasizes lift along the cheekbones, elongation at the jawline, and a refined forehead shape. When approached with patience and a calm, methodical rhythm, makeup becomes a language of dimension that respects the face’s inherent softness while guiding attention toward the eyes, the cheekbones, and the natural arch of the brow. The goal is balance: a refined, elongated look that still feels approachable and true to the individual’s features.
Understanding the Round Face Shape
A round face is typically characterized by cheeks that are full and a width that mirrors or even exceeds the height, creating a soft, symmetrical appearance. This shape often features a gentle taper at the jawline, a wide cheek area, and a hairline that can be curved without sharp angles. When makeup artists consider a round face, they look for ways to create vertical emphasis and optical narrowing by guiding light to specific zones and by casting soft shadows along the outer perimeter of the face. The understanding begins with recognizing where the widest part of the face sits, most commonly across the cheekbones, and how that measurement informs placement of contour, highlight, and blush. The underlying principle is to craft a subtle contrast between the center of the face, which should appear lively and bright, and the outer edges, which can be defined to create the illusion of length.
Base and Foundation for Balance
Base work for a round face starts with a skin that is well prepped, hydrated, and evenly toned. The selection of foundation should reflect the undertone and the desired degree of coverage, aiming for a natural finish that reads as skin rather than masking. A slightly lighter shade on the central zones of the face can brighten the area that naturally draws attention, including the center of the forehead, the bridge of the nose, the tops of the cheeks, and the chin, while a deeper shade along the temples, the hollows under the cheekbones, and the jawline helps carve a softer edge. Blending is essential; the transition between shades must be seamless so there are no stark lines that interrupt the eye’s journey from the center outward. The base is not merely about hiding imperfections but about establishing a tonal map that allows subsequent contour and highlight to sit properly on the face, enhancing structure without appearing harsh or artificial.
Contour and Highlight Strategy
Contour on a round face should sculpt rather than truncate, meaning the goal is to create the illusion of length and angularity through carefully placed shadows while preserving natural skin texture. Cream or powder contours can be used, but the edges should be soft and diffused rather than razor-sharp. A common approach is to apply contour along the temples near the hairline and beneath the cheekbones to carve a more defined cheek structure, and to extend slightly toward the jawline to create a gentle taper. The jawline itself can benefit from a light shadow to minimize the appearance of roundness, and the hollows just beneath the cheekbone should be emphasized with a touch of pigment that remains matte to avoid drawing attention to texture. The highlight plays a supporting role, concentrated along the center of the face where light naturally lands—center of the forehead, the bridge of the nose, the peak of the cheekbone, and the chin—so that the face reads vertically longer. Blending is the implement that turns a practical plan into a believable illusion; it should be meticulous, with edges fading into the surrounding skin to avoid any hard lines that shout, “contour here.”
Blush Placement for Balance
Blush is a powerful ally for round faces when used to lift and elongate, but it must be placed with intention. Rather than sweeping color toward the apples of the cheeks in a broad, circular motion, a practitioner can apply blush slightly higher on the cheekbone and blend upward toward the temples. This elevates the eye line and creates the perception of a taller, more sculpted face. The choice of shade matters; a rosy or peach tone with a soft satin finish tends to blend naturally into the skin and catch light just enough to sculpt without looking metallic or flat. The direction of blend is crucial: the blush should fade away from the center rather than toward the center, maintaining a gentle gradient that visually draws attention upward. If the blush appears too concentrated near the center, it can shorten the face, so patience in blending is essential to achieving a lifted, balanced effect.
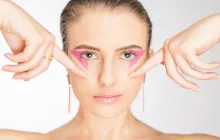
Eye Makeup to Create Vertical Length
The eyes can be the defining feature that anchors the perception of a round face, so shaping the brow and eyelids to suggest vertical length can dramatically alter the overall look. Brows should follow a natural arch but can be slightly higher and more elongated than average to frame the eye and create an impression of height. Eyeliner can play a starring role when applied with a slender, outward flick that extends beyond the outer corner. The wing should be precise but kept clean and soft to avoid a harsh line that competes with the face’s softness. Eyeshadows can be arranged to emphasize the outer V and lift the lash line, using mid-tone matte shades on the lid and a lighter tone toward the inner corner to brighten without flattening. Lower lashes can be lightly defined to maintain harmony, while upper lashes are given a touch of mascara or a natural lash lift to propel the gaze upward. The end result is an eye contour that visually adds height and balance to the face’s roundness.
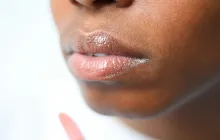
Lip Techniques to Streamline and Balance
Lips offer a counterpoint to the roundness of the cheeks and chin, and the choice of lip line can influence perceived proportions. A lip shape that is slightly elongated or angular can harmonize with the upward and outward emphasis created elsewhere on the face. Lip liner should define the Cupid’s bow and the corners of the mouth with a careful, soft hand, avoiding any abrupt, squared shapes. Lip colors that are rich in depth but not overly glossy help maintain a sophisticated silhouette, while a touch of lighter color in the center of the lower lip can create the illusion of vertical dimension. Texture matters as well; a satin or demi-matte finish tends to hold up well on many complexions and stays visually cohesive with a sculpted cheek and contoured jawline. The goal is to ensure that the lips complement the balance of light and shadow on the rest of the face, rather than visually competing with it.
Cheekbone Definition and Jawline Sharpness
Defining the cheekbone and sharpening the jawline are two pillars of a cohesive look on a round face. The contour under the cheekbone should follow the natural hollow and extend toward the ear, a flourish that creates a chiseled appearance without creating harsh planes. The aim is to produce a gentle, continuous shadow that makes the cheek prominent and gives the face a longer silhouette. The jawline can be subtly refined by applying a touch of contour along the edge from the ear toward the chin, ensuring a smooth line rather than a heavy stripe. To keep the finish musical rather than clinical, blend thoroughly where contour meets foundation, and soften the transition into the neck area so the look reads as a single, intentional sculpture. A touch of highlighter on the high points of the cheekbone, the bridge of the nose, and the center of the chin can contribute a sense of life and movement without erasing the contours that define the look.
Tools and Texture: Cream vs Powder
Product choice and texture are central to achieving a natural yet defined appearance on round faces. Cream products often offer superior blendability, letting you build depth gradually and integrate shading seamlessly with existing skin texture. Cream contour placed with fingers or a brush can melt into the skin, creating a soft edge that is easier to diffuse into a powder overlay if you desire greater staying power. Powder contour and highlight can then be used to lock the look in place while refining the edges and heightening contrast in the desired zones. The key is to layer with patience, applying thin coats and blending with circular motions until the shading looks like a natural extension of the bone structure rather than an obvious makeup addition. The selection of brushes matters; a small, angled brush for contour, a flat brush for precise blending, and a fluffy brush for soft transitions are all part of a thoughtful toolkit.
Skincare Prep for Makeup Longevity
Skincare is the quiet engine behind a successful makeup application, especially for a round face where the texture and hydration of the skin can influence the final effect. Begin with a gentle cleanse and a nourishing moisturizer suited to your skin type, followed by a primer that suits your foundation strategy. A silicone-based primer can smooth out texture and create a forgiving surface for cream products, while a hydrating primer helps prevent dryness that can make contour lines appear patchy. Allow time for the primer to set before moving on to foundation, and consider a lightweight sunscreen if you will be in daylight, as sun exposure can complicate color matching and longevity. The best practice is to map your routine so that each layer has a moment to settle, ensuring the contour and highlight do not slip or crease over the course of the day.
Common Mistakes to Avoid
Common missteps in makeup for round faces include overemphasizing the center with too much highlight, which can draw attention to the width rather than the length of the face, and using contour lines that are too harsh or too centralized, which can create an appearance of heaviness in the midface. Another frequent error is choosing blush colors and placements that momentarily narrow the look of the cheeks in a way that contracts the face rather than elongates it. A lack of brow definition can also undermine the overall balance, because brows anchor the eye and set the vertical frame of the face. Finally, neglecting to blend is a subtle but serious mistake; unblended edges destroy the illusion of shape and make the finish look artificial rather than harmonious. The antidote to these issues is a deliberate, light touch, measured layering, and a constant check in natural light to confirm that the sculpture remains natural and fluid.
A Practical Routine to Embrace the Look
In practice, a round face makeup routine begins with a thorough skincare base, a well-fitted foundation that matches your skin tone, and a primed surface that holds product smoothly. The contour is then introduced along the temples and beneath the cheekbones, with a soft edge that extends toward the jawline to suggest length. The blush is applied slightly higher on the cheek, blending toward the temple, to lift the features without creating a circular emphasis. The eye makeup seeks vertical balance through a carefully shaped brow, a refined eyeliner wing, and a layered eyeshadow scheme that emphasizes the outer corner and lifts the gaze. The lips follow with a line that defines the Cupid’s bow and a shade chosen to harmonize with the cheeks and eyes, delivering a finished effect that feels lifted and elegant. This routine, when practiced with patience and a steady hand, yields a look that honors the face’s natural roundness while revealing an appearance that is longer, more defined, and irresistibly polished.